Overview
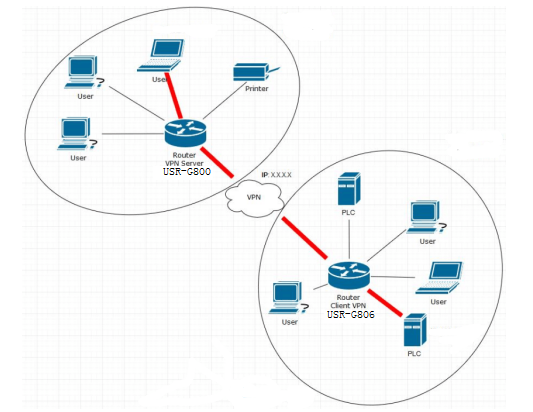
This manual is to introduce the method to establish VPN tunnel between USR-G800(VPN Server) and USR-G806(VPN Client).
Note: After configuring G806 and G800, user needs to restart modules. And user can connect G800 VPN server interface(Only G806 one VPN Client connection, so only ppp0 in test) after configuring and restarting G806 and G800.
1.Configure USR-G800
1.1.Enter G800 Web Server
Connect PC to G800 LAN interface or WLAN interface and configure PC into DHCP mode as follow:
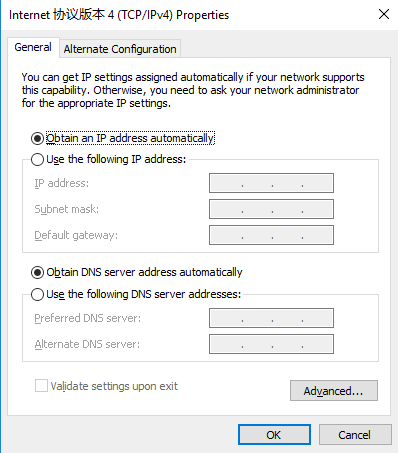
Figure 1 Configure PC to DHCP mode
Then enter G800 Web Server by entering G800 LAN interface IP address (Default is 192.168.1.1) and login with username and password(Default both are root). User can switch between English/Chinese from top right corner.
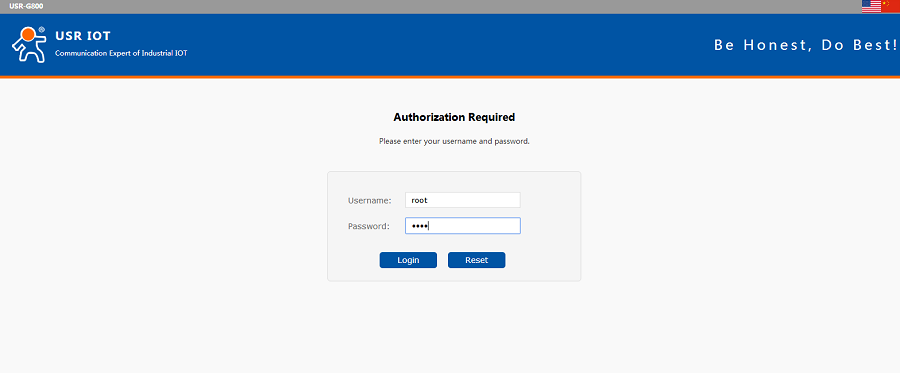
Figure 2 Enter G800 Web Server
1.2.Upgrade firmware
User also needs to upgrade G800 firmware to USR-G800-V1.0.15-vpnserver-1801221557.bin which supports VPN Server function.
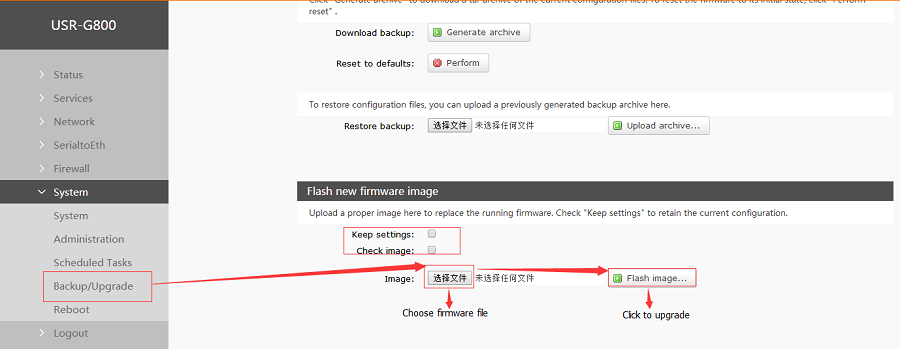
Figure 3 Upgrade firmware
Note: User can’t choose ‘Check image’ if user upgrades G800 from higher firmware to lower firmware.
The whole firmware upgrading process will last 30s~50s and user must keep powering the module and connecting to module during upgrading process. User needs to enter Web Serve again after upgrading successfully(Over 50s).
1.3.Enable VPN Server and configure parameters
Firstly, user should enable VPN Server and configure general parameters by Web Server as follow:
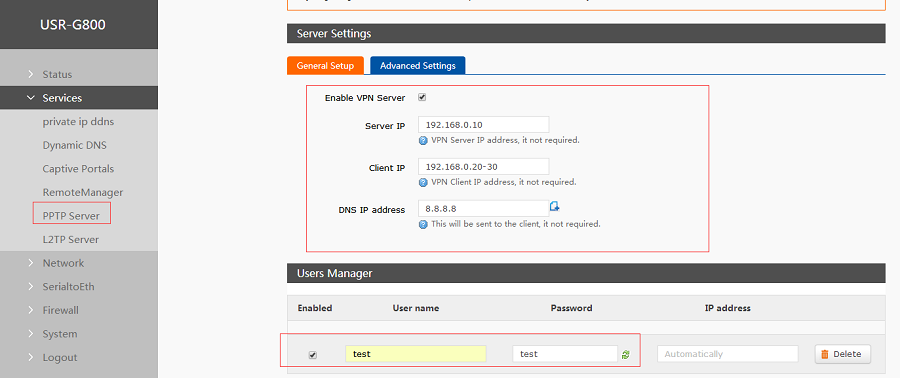
Figure 4 VPN Server general parameters
After clicking ‘Save & Apply’ on bottom of web page, user also needs to configure VPN Server advanced parameters as follow:
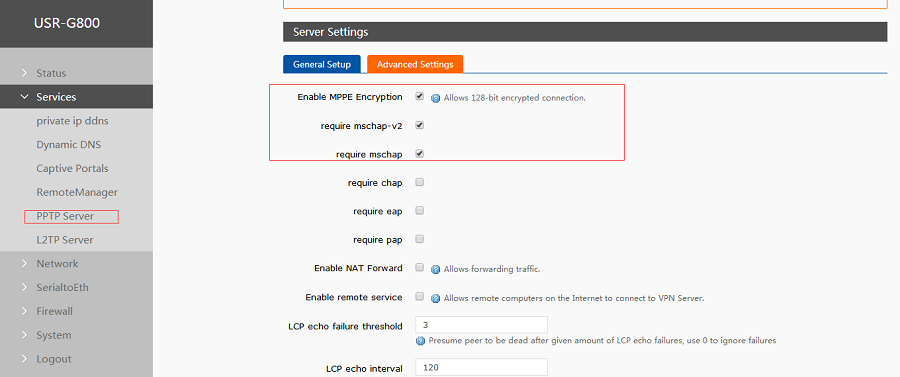
Figure 5 VPN Server advanced parameters
1.4.Add VPN Server interface
User can add VPN Server interface as follow:
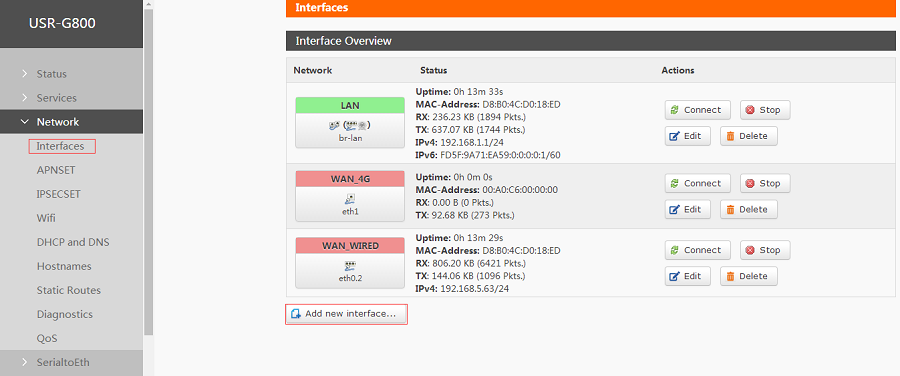
Figure 6 Add new interface
Then configure VPN interface as follow:
- Name of the new interface: User can configure the ‘Name of the new interface’ according to own wants which must conform to rules.
- Protocol of the new interface: Choose ‘Unmanaged’.
- Cover the following interface: When user adds new VPN Server interface and configures ‘Custom Interface’, user should add one new interface from ppp0 once there is new VPN Client connection.(In this manual, only one G806 connects to G800 as VPN Client, so configure ‘Custom Interface’ to ‘ppp0’. If there are two VPN Client connections, G800 should have two new interface with ‘’ppp0’ and ‘ppp1’.)
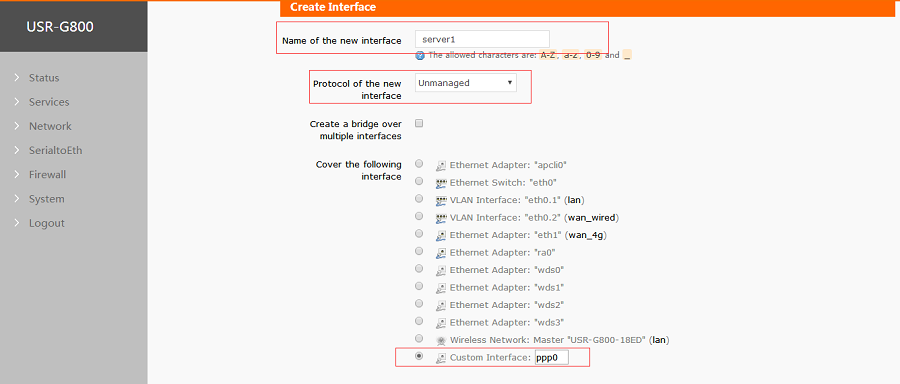
Figure 7 Configure VPN Server interface
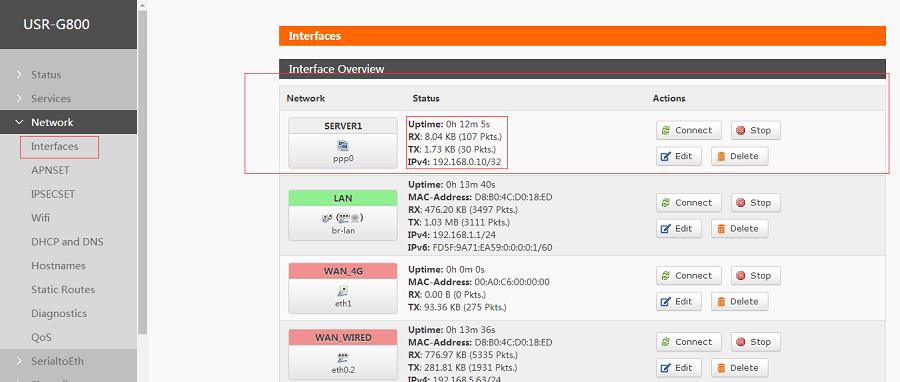
After VPN Client connecting, the ppp0 interface will display as follow:
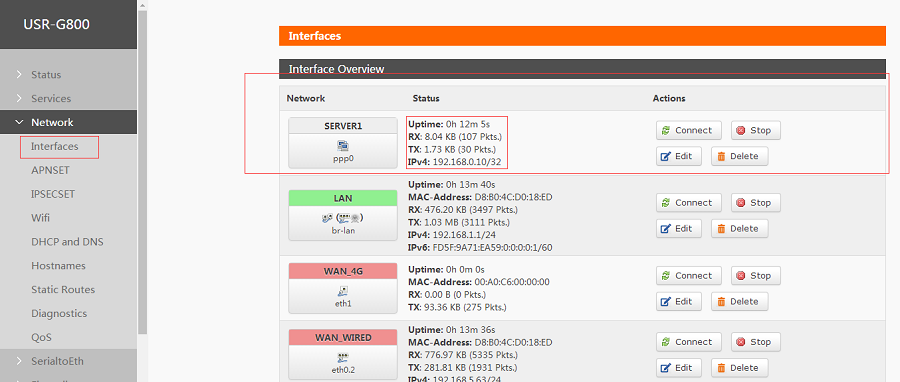
Figure 8 VPN Server interface
1.5.Configure Static Routes
To achieve communication between two router’s device through VPN tunnel, user should configure ‘Static Routes’.
Configure the Static routes as follows:
- Interface: Choose VPN interface.(server1 in this test)
- Target: 192.168.10.0. IP of VPN Client’s(G806) device. G806’s LAN IP is changed to 192.168.10.1 in next steps, so Target set to 192.168.10.0 can communicate to all device which connect to G806 LAN interface.
- IPv4-Netmask: 255.255.255.0.
- IPv4-Gateway: 192.168.0.10(VPN Server IP which same as G800 PPTP Server parameters)
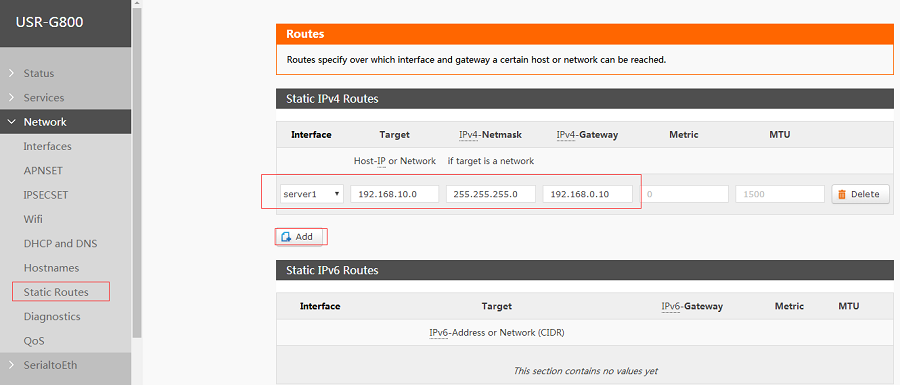
Figure 9 Static Routes configuration
1.6.Configure Firewall
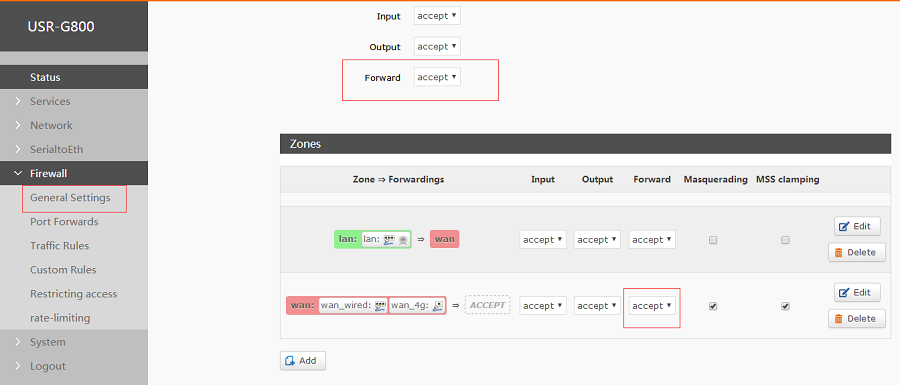
Figure 10 Configure Firewall
2.Configure USR-G806
2.1.Enter G806 Web Server
Connect PC to G806 LAN interface or WLAN interface and configure PC into DHCP mode as follow:
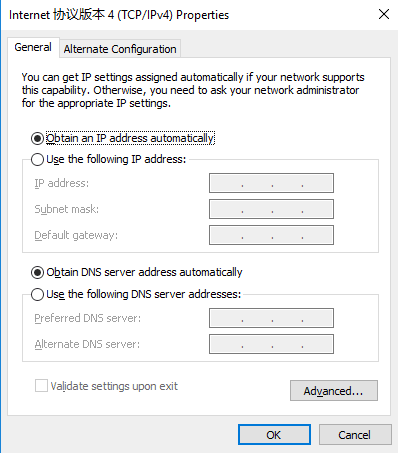
Figure 11 Configure PC to DHCP mode
Then enter G806 Web Server by entering G806 LAN interface IP address (Default is 192.168.1.1) and login with username and password(Default both are root). User can switch between English/Chinese from top right corner.
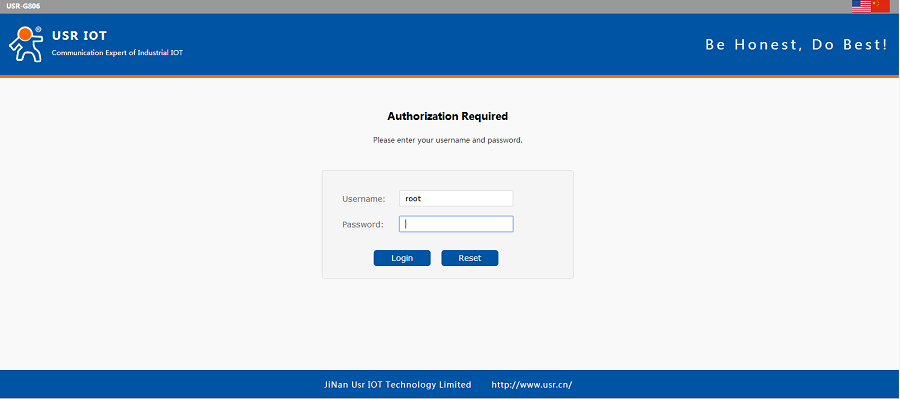
Figure 12 Enter G806 Web Server
2.2.Modify G806 LAN interface IP
After entering G806 Web Server, because G806’s default LAN interface IP is same as G800’s default LAN interface, we change G806’s LAN interface IP address to 192.168.10.1 as follows:
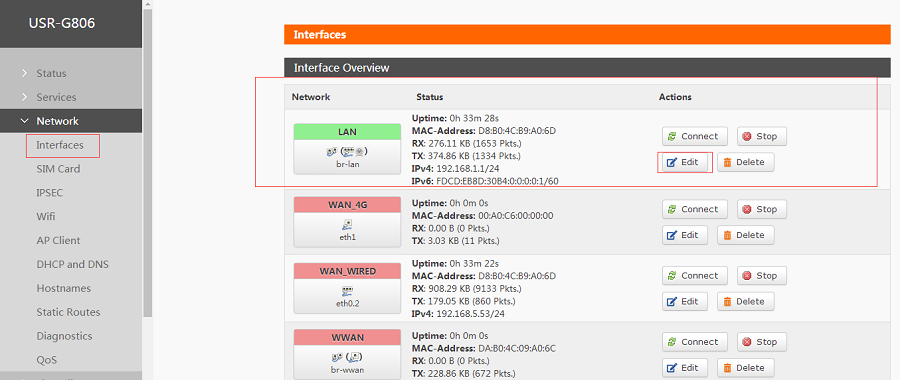
Figure 13 Modify G806 LAN interface IP
After modifying to 192.168.10.1, user should click ‘Save&Apply’ on bottom of web page to make settings take effect. And user also needs to enter Web Server by 192.168.10.1 again.
2.3.Add VPN Client interface
Firstly, add new interface with protocol PPtP as follows:
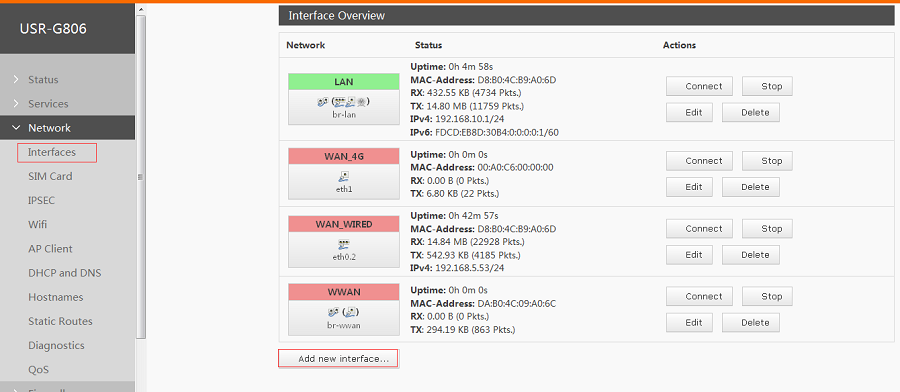
Figure 14 Add new VPN Client interface
After configuration, user should click ‘Submit” on bottom of web page to continue configuring.
Then configure VPN Client interface as follows:
- VPN Server: 192.168.5.63(We take LAN test as a example, so we write G800’s WAN interface IP address from superior router here. In actual use, user should use public network IP address or domain name)
- PAP/CHAP username: test(Same as G800 VPN settings)
- PAP/CHAP password: test (Same as G800 VPN settings)
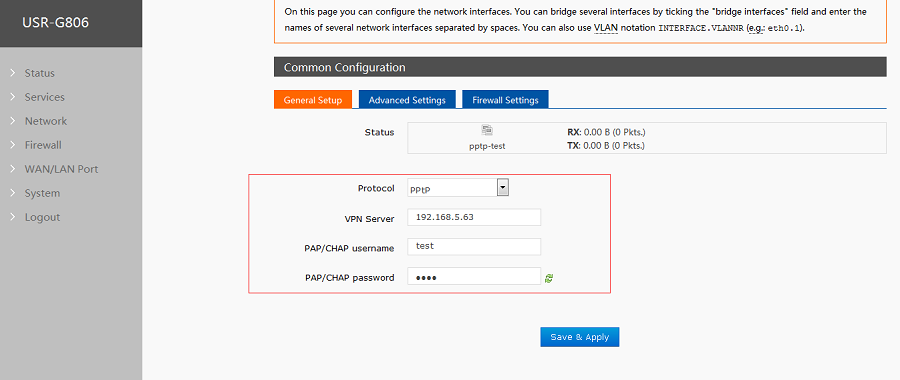
Figure 15 Configure VPN Client interface
User can know G800’s WAN interface IP as follow(We connect G800 to superior router by wired WAN interface not insert SIM card to connect internet in the test):
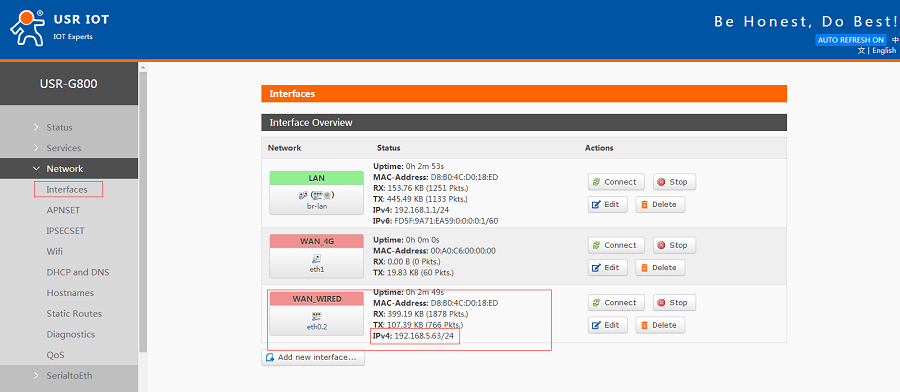
Figure 16 G800 WAN interface IP
2.4.Configure Static Routes
To achieve communication between two router’s device by VPN tunnel, user should configure ‘Static Routes’.
Configure the Static routes as follows:
- Interface: Choose VPN interface.(test in this test)
- Target: 192.168.1.0. IP of VPN Server’s(G800) device. G800’s LAN IP is 192.168.1.1, so Target set to 192.168.1.0 can communicate to all device which connect to G800 LAN interface.
- IPv4-Netmask: 255.255.255.0.
- IPv4-Gateway: 192.168.0.20(VPN Client IP which same as G800 PPTP Server parameters)
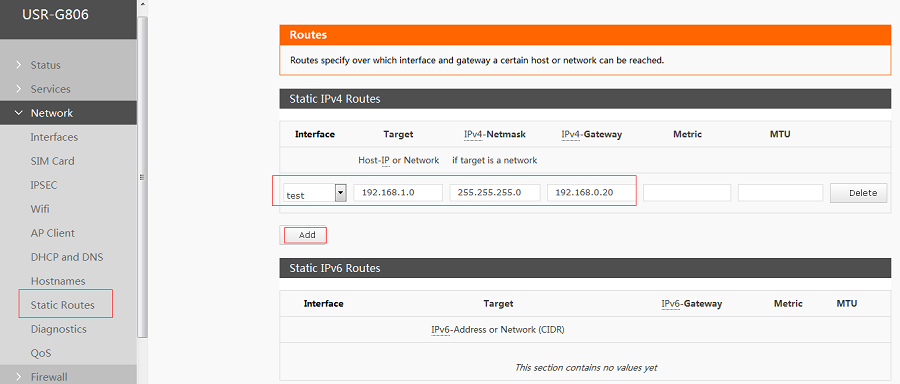
Figure 17 Configure Static Routes
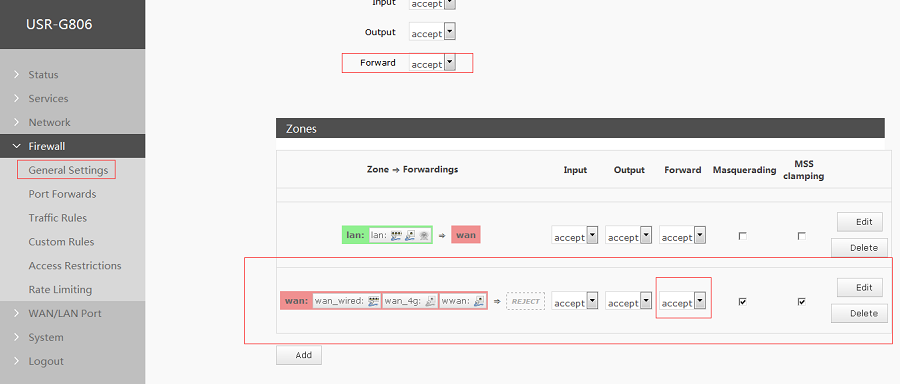
2.5.Configure Firewall
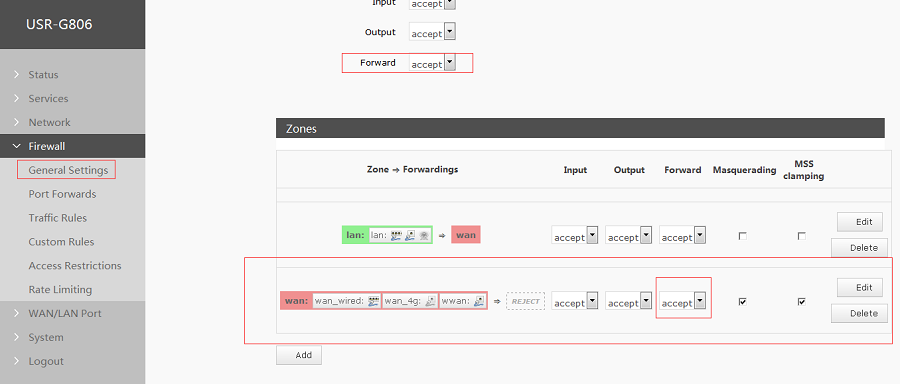
Figure 18 Configure Firewall
3.Test
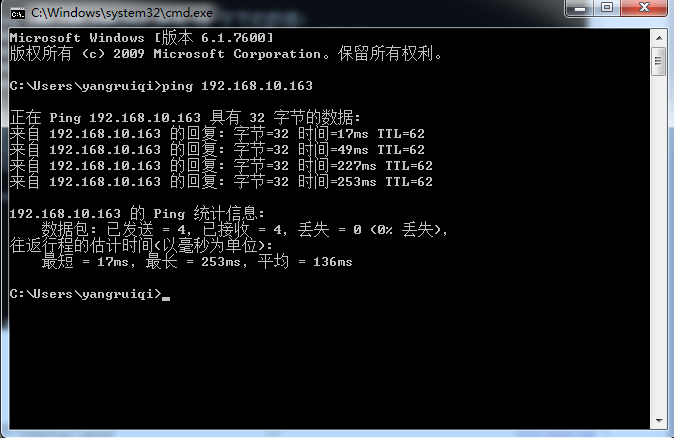
After above all configuration, user can connect G806 and G800 to a same superior router and ping successfully between G800’s device and G806’s device as follow:
